Best Practice
Project organization
Project organization refers to the way you organize the elements of your production on your computer. Everything should be in one place and classified in folders so that the elements and hierarchies are easily understood by anyone else who may be involved in the project–now or in the future.
There are several reasons why this is considered a best practice for professional work, most of which are self-explanatory. If you produce a lot of projects over a short period of time, you will need to keep the elements of one project separate from another. If you are working on two or more projects at the same time, you will need to keep the elements for each project separate.
But perhaps the most important reason for project organization has to do with the possibility that you may need to pass your project to another person due to an emergency or because you are pulled away to another project. If a project is pulled out of archive to be revised at a future date, you might not be the person who does the work. The organization of your elements should be obvious to anyone who looks at it.
In any of these situations, you would want the person who takes over your work to be able to walk right into the situation and begin their work with the minimum amount of delay. When your project elements are organized, you protect yourself from the possibility of a project falling apart because no one can understand how you put your project together. Also, you would not want someone to interrupt you while you are busy with another project because you have to explain how you assembled a prior project.
Method of organization
The method of project organization offered in this chapter is only a starting point for you to develop a method that would work best for you. Whichever way you organize your production elements, it should immediately makes sense to anyone who looks at it. Your method of organizing your production elements should include the following folders (see the examples at the end of the chapter):
- a folder for the project files
- a folder or the source elements
- a folder for special production files like Photoshop files or other files used to process elements used in the master project
- a folder for audio elements
- a folder for text documents like scripts or other reference material
- a folder for miscellaneous objects that are obsolete but should be kept around for the record.
File naming protocol
Every file that you use in your production should be named descriptively. If there are progressively new versions of the file, a numeric iteration should be included after the name. If there are elements that are obsolete or no good for whatever reason, place them in a location that is clearly indicated as a place for files that are no longer relevant to the production.
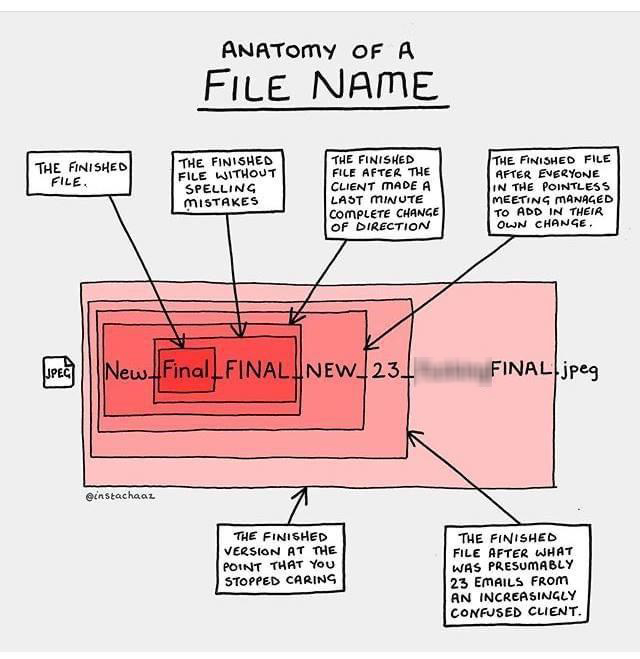
The use of the term “final” should only be used for elements that are, in fact, final. No file should be named “final” that is not actually final.
The use of the word “master” should only be used for the object (or objects) that are the actual deliverables.
There should never be a numeric iteration of a file with the word “master” in it. The final master is the final version.
File naming no-nos
All files must be named. No files should have a default name like “Untitled” or a string of numbers and letters generated automatically by a recording device, like DSC000001.JPG
All file names should have some semblance of description in the file name, like “Smith Company logo.png.” No files should have a name like “file.png” or “image.jpeg.”
File iteration protocol
The most important files in your collection of project elements are your project files. Project files are the files that are generated by the authoring system you are using to assemble the project. Your project file has all of the composing work and references to files in your project that were used in the creative work you have done so far.
Great care must be taken to make sure that your project files are kept in a secure place with a backup copy created at the end of your daily session.
It is a best practice to make numeric iterations of your project file whenever you have done significant changes to the prior version. For example, let’s say that you work for an entire day on a project and you save your project file with the name “Sales Training V1”, meaning that this is the sales training production project, version number one. On your second day of work, the first task you should do is open “Sales Training V1” and perform a “Save as” command to create a copy of this project file and save it with the name “Sales Training V2”.
There are two primary reasons for this practice. The first has to do with the preservation of the first version of your work in case your project file for version 2 becomes corrupted or unusable. The second reason has to do with the possibility that you may do some destructive edits to the work you did on the first day that would be lost if you ever wanted to backtrack, creatively, to a prior point in your work. At some point, you may realize that the work you did on the first day was better than the work you did on the second day. If you do not preserve what you did on the first day, you have no way restart your work from where you left off after day one if you needed to
Keep in mind that the version iterations that you generate for each subsequent project file is for your reference only. It does not matter how many iterations you create of your project file as you go through the process of producing the final result. Creating iterations is for your own protection.
Once your project has been completed, you can append your project file name with the word “final”, such as “Sales Training V12 – Final”. This labeling practice will show anyone who needs to review your project in the future that this is the project associated with the master that was delivered to the client. The iterations also help other people understand your creative progress throughout the term of the production.
Project backup protocol
Placing all of your production elements in one location–presumably on your computer’s hard drive–presents a single point of failure for your entire project. The best practice for your day-to-day project work is to maintain an updated copy of your project work on a separate device such as a thumb drive, an external hard drive, or a cloud storage location.
However unlikely it may be that a catastrophic event may occur, if it ever does happen, you may have no recourse if you have not followed these best practices. There may be significant financial or even legal ramifications if your client cannot meet a deadline because you are unable to retrieve your project from an alternate location after a hard drive failure.
Project archiving
When a project has been completed, the contents of your production folder should be cleaned up and prepared for archiving in a safe location for future reference–preferably in two separate archive locations in case your regular archive location is vulnerable, such as on an external thumb drive.
The following images are examples of project folders that follow the best practices describe above.
Example: Simple project organization
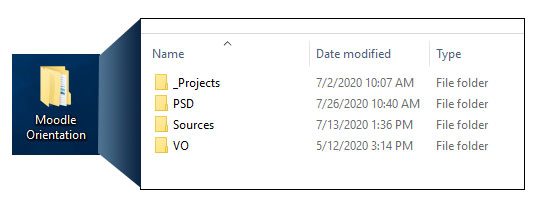
This is the contents of a simple project folder. Note that the Projects folder (for the project files) has an underscore at the beginning so that it sorts at the top of the alphabetical listing. This is not a requirement, but it comes in handy when project content becomes more complex, such as in the second example.
Example: Complex project organization

This is a more complex project. It contains a main project and a couple of “sub-project” folders. The main project required producing a separate video (“FERPA Opening Video”) that was used as an ingredient of the main project (“FERPA V8 – Final”).
There were several collections of sources that needed to be kept separate:
- The Documents folder contained the final script and a collection of compliance documents supplied by the client which were used as a reference when writing the script.
- The Exports folder is where the final multimedia objects were sent from the authoring system. In this case, the final program was published in multiple formats.
- The Icons folder was created separately from the Sources folder because there were an unusually large amount of icons created for this project. It seemed practical to keep them separate from the rest of the other miscellaneous sources, like images and screen capture clippings.
- The Marketing Resources folder was created since the Marketing department mandated the use of specific images that had been approved and licensed for use in this project. A person viewing this project in the future might need to know which images originated from the Marketing department which ones were retrieved from Creative Commons sources.
- The Music Logo folder was another “sub-project” that involved editing together several audio clips to produce a single audio file used in the introduction of the program. These were kept separate from the voiceover audio files.
- The “zzNG” folder holds all of the old project files and other elements that were not used in the final project.
